Wednesday, January 30, 2013

project let down

Have you planned a wedding or a big party? Have you taken on a big challenge that had a deadline? Attempted something that had a lot of build up and a very exciting climax? After it was all over did you feel a little lost and without purpose?

I used to work as an event planner and this would always happen the Monday after an event. The same thing happened after our wedding I was so busy planning for 4 months that when it was over I didn't know what to do with myself. I refer to it as project let down.

I am suffering from project let down. I just worked on a fun project that needed to be in the mail today. I made it, got it completed and in the mail. I am super proud of it and spent a portion of the morning vocalizing this to my husband and texting it to friends. I spent the rest of the day thinking about which project should be next. I have at least a dozen things I could focus on but honestly none of them seem as interesting as the one I just finished.

This must be what adrenaline junkies feel like after a big rush. They savor it and then are off to find the next one. In between they just talk a lot about the last one. Wonder what you would call me? Craft junkie? DIY Junkie? Maybe it is more of an -itis. Like if you have bronchitis the doctor gives you antibiotics. I have Martha Stewart-itis can get a project over here?

Finishing a project always seems to have me reflecting on how I ever found the time to do the project. How did I get that done while working 50 hours, cooking dinner, sleeping and spending time with my husband?I think I will continue to take the night off from projects and work on the post about the project I was so proud of today or just kill some time on Pinterest looking for inspiration. No matter what I do tonight the project I finished today will be up on the blog Monday when I am sure it has gotten to where it is going. If you have followed me on Instagram you have already seen some sneak peaks. If you don't but have read my DIY project list for the year this is the felt project.

Hopefully tomorrow brings a refreshed view on this and a renewed purpose and drive to get started on the next thing!


Tuesday, January 29, 2013

sloppy joe slop sloppy joe

I didn't care for most of Chris Farley's work on Saturday Night Live but the man WHO LIVED IN A VAN DOWN  BY THE RIVER and the lunch lady were the exceptions. Just the words sloppy joe gets me singing that Adam Sandler song. Sloppy Joe, slop sloppy joe...I really hope my audience is some what close to my age because these random pop culture references could be tough to follow. 

I will take What's for dinner for $200 Alex.
Here's the clue: Anne's dinner tonight
What is Sloppy Joes, Alex? 
That is correct!

As you may know I have been working through some the magazines I get in the mail and have found a few new recipes this month. Last week I made a pasta sauce out of Fine Cooking and while it was good I kept thinking it would make a better sloppy joe than a pasta sauce. So tonight I did exactly that.


My mom used to make us sloppy joes from a can of Manwich when my dad was on business trips. We used to eat them while we watched Jeopardy with her.  She probably wouldn't even think to buy a can of Manwich these days. This is a step up and a recipe my gourmand of a mother might even make. These are Lamb Sloppy Joes. Brought on by a recipe for quick lamb sugo from the February/March 2013 issue of Fine Cooking.

Lamb Sloppy Joes

kosher salt
2 Tablespoons olive oil
2 celery stalks, cut into a small dice
1 small onion, cut into a small dice
1 pound of ground lamb
freshly ground black pepper
1/4 cup tomato paste
3/4 cup dry red wine
1/4 teaspoon chinese five spice 
1 teaspoon dried oregano 
3/4 cup tomato juice

Heat the olive oil in a 12 inch skillet over medium-high heat. Add the celery, onion, and 1/2 teaspoon salt. Cook, stirring frequently until softened and just starting to brown, about 4 minutes. 

Add the lamb, 1/2 teaspoon of pepper, and another 1/2 teaspoon salt and cook, stirring to break up the meat, until lightly browned and cooked through, about 4 minutes. 

Move the mixture to the side of the pan and carefully tilt the pan to pool any fat on the empty side. If necessary, spoon off all but 2 Tablespoons. 

Add the tomato paste and mash it on the bottom of the skillet to brown it slightly, about 1 minute, before stirring into the meat. Add the wine and cook, stirring and scraping the bottom of the skillet to loosen any browned bits, until most of the liquid has evaporated, about 2 minutes. Add chinese five spice and oregano.

Add the tomato juice and continue to cook, stirring occasionally, until the sauce thickens and clings to the meat, about 3-4 minutes.  Season to taste with salt and pepper. Serve on buns either traditional or open face. 

Celery and onion cooking
The original recipe called for fennel instead of celery but I didn't have that tonight. To give it some of that anise flavor fennel adds I used chinese five spice. This also gave the sauce a flavor very different from an italian meat sauce.

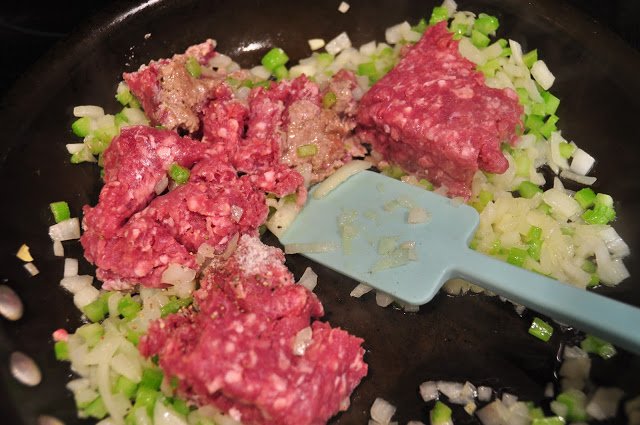
 Lamb added to celery and onion with salt and pepper
In case you are curious that is my favorite spatula. It is all made of the same material, no seams making it easy to clean because there are no cracks for food to get stuck in. This one was made by the omni-one, Martha Stewart. I can't find them anymore so it you see one let me know where I can get more. 

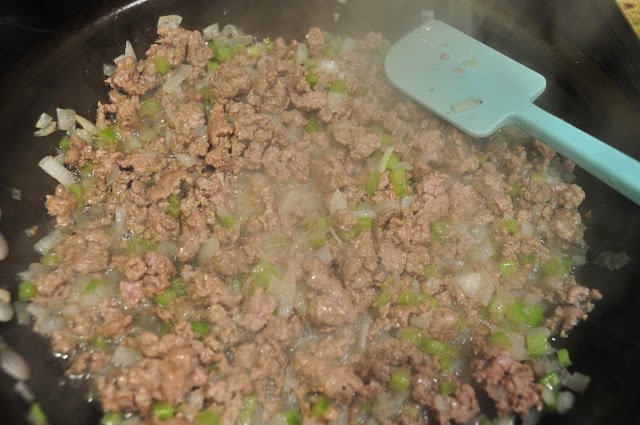
 Lamb cooked and ready for liquids

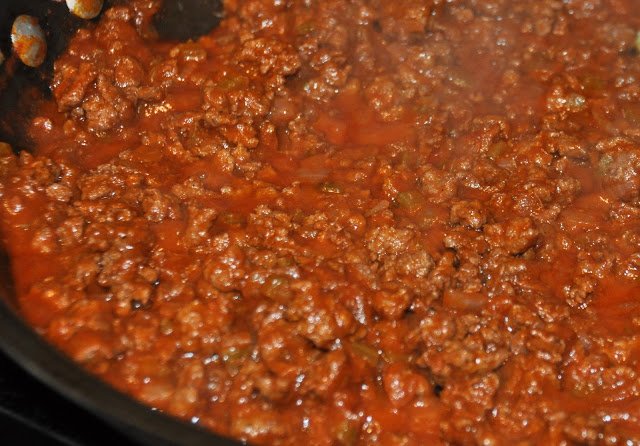
 Finishing the thickening of the sauce 

For those of you that would like to try the original recipe for a quick lamb sugo.

Quick Lamb Sugo

kosher salt
2 Tablespoons olive oil
1 small fennel bulb, trimmed, corded, and cut into a small dice  (about 1 3/4 cups), plus 1 to 2 Tbs. chopped fennel fronds
1 small onion, cut into a small dice
1 pound of ground lamb
freshly ground black pepper
1/4 cup tomato paste
3/4 cup dry red wine
3/4 cup tomato juice
1 Tablespoon chopped fresh oregano

Heat the olive oil in a 12 inch skillet over medium-high heat. Add the fennel, onion, and 1/2 teaspoon salt. Cook, stirring frequently until softened and just starting to brown, about 4 minutes. 

Add the lamb, 1/2 teaspoon of pepper, and another 1/2 teaspoon salt and cook, stirring to break up the meat, until lightly browned and cooked through, about 4 minutes. 

Move the mixture to the side of the pan and carefully tilt the pan to pool any fat on the empty side. If necessary, spoon off all but 2 Tablespoons. 

Add the tomato paste and mash it on the bottom of the skillet to brown it slightly, about 1 minute, before stirring into the meat. Add the wine and cook, stirring and scraping the bottom of the skillet to loosen any browned bits, until most of the liquid has evaporated, about 2 minutes. 

Add the tomato juice and continue to cook, stirring occasionally, until the sauce thickens and clings to the meat, about 2 minutes.  Season to taste with salt and pepper. Add the fennel fronds and oregano, cook for 1 minute longer, and remover from the heat. Serve over your favorite pasta. 

If sauce gets too thick add a little bit of the pasta water to loosen. 

Tuesday, January 22, 2013

coffee bar done right

To all of you that are new to the blog, and there sure are a lot more of you these days, thanks for stopping in.  I hope some of you stick around for the fun things that are coming later this year. In case you missed one of my favorite projects from last year here is a little recap.

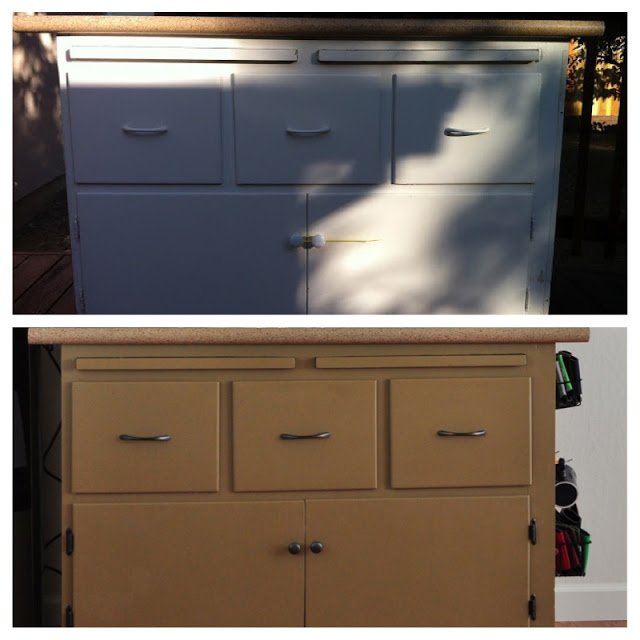
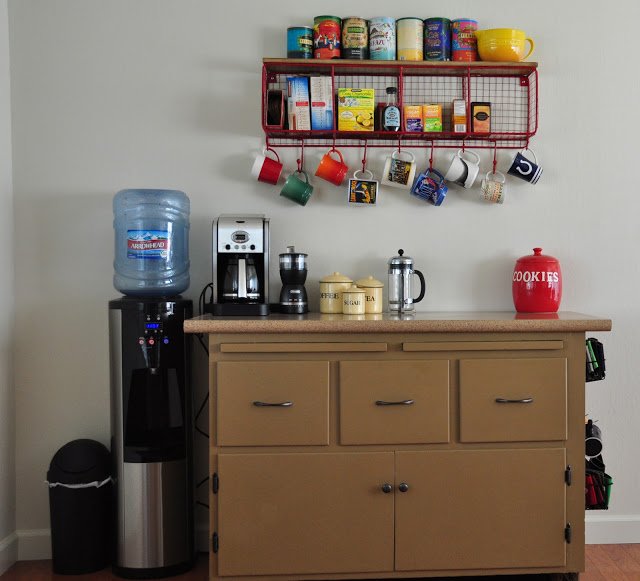
The project I did in the last year that I am most proud of is the coffee bar. However, when I posted the finished piece in it's new home I didn't really give it the time it deserved so today seemed a good day to correct that wrong. You can read about the ridiculous challenges I had refinishing this piece here. It is a fun story and a great example about why you should not paint over the hardware on your cabinets. If you are looking for information on sources you can find those on this post.
The finished project has been in the house for four months and I still look at it everyday with pride. It holds everything we need for coffee, tea and the extra storage is essential in this funny kitchen that was so obviously designed by someone that doesn't cook. Having a water cooler in the house always seemed odd to me, but it is really one of the greatest ideas we had. The coffee tastes better with this water and I drink more water because it is so conveniently the right temperature.


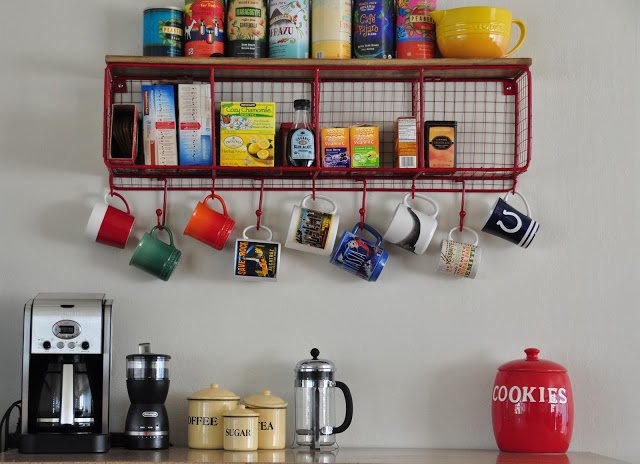
We have really grown the coffee cup collection since we put the shelf up. You can see more evidence of my love affair with Le Creuset. I guess I could have staged the cubbies to let you believe I have everything here looking like a magazine but that would be so far from the truth and would just feel insincere. Everything in my house is not well put together like some of the other blogs out there. It all has a home and is quite functional which is what I need out of my spaces. 


You can also see the evidence of my crush on Fiestaware. I love that Fiestaware and Le Creuset both allow me to mix the colors to make for a bright cheerful kitchen. Then there is the coozie/koozie collection. That is evidence of a lot of punk shows, two years at The Fest in Gainesville, sporting events, gift from friends and even a wedding favor in there. I don't get as much use out of them these days but like any souvenir they are great memories and it is fun to have a place to show them off and I still collect them.  I love this picture because in the background you can see my favorite Gaslight Anthem poster. This poster is the inspiration for the kitchen colors and the blog design.


What project are you most proud of? Put a link in the comments so I can check out your pride and joy.


Monday, January 21, 2013

Jamaican Spiced Upside-Down Cake

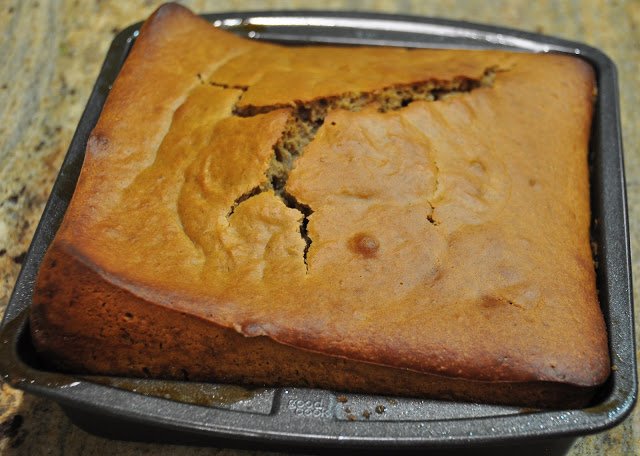
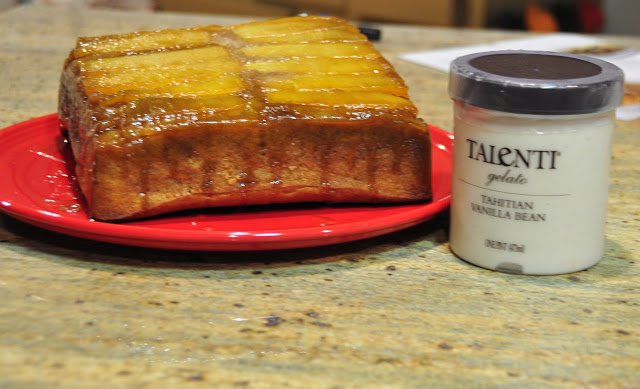
I love to bake but I stick mostly to cookies. However, since I promised myself I would cook from every magazine I get I am trying a lot of new things. Last night we had cake! Jamaican spiced upside-down cake to be precise. And since a picture is worth a thousand words I give you...


This recipe didn't come from one of the recent magazines. It actually came from the October issue of Everyday Food. Everyday Food has been one of my favorites for years and I will be said to see it go. It was always filled with a lot of quick easy recipes that Martha Stewart doesn't have. 

As with any upside down cake you have to put something on the bottom that will look purdy when you flip it over. This one has pineapple. Instead of slicing my own pineapple I bought slices from the produce section and then just sliced those thinner to make the layers I needed.


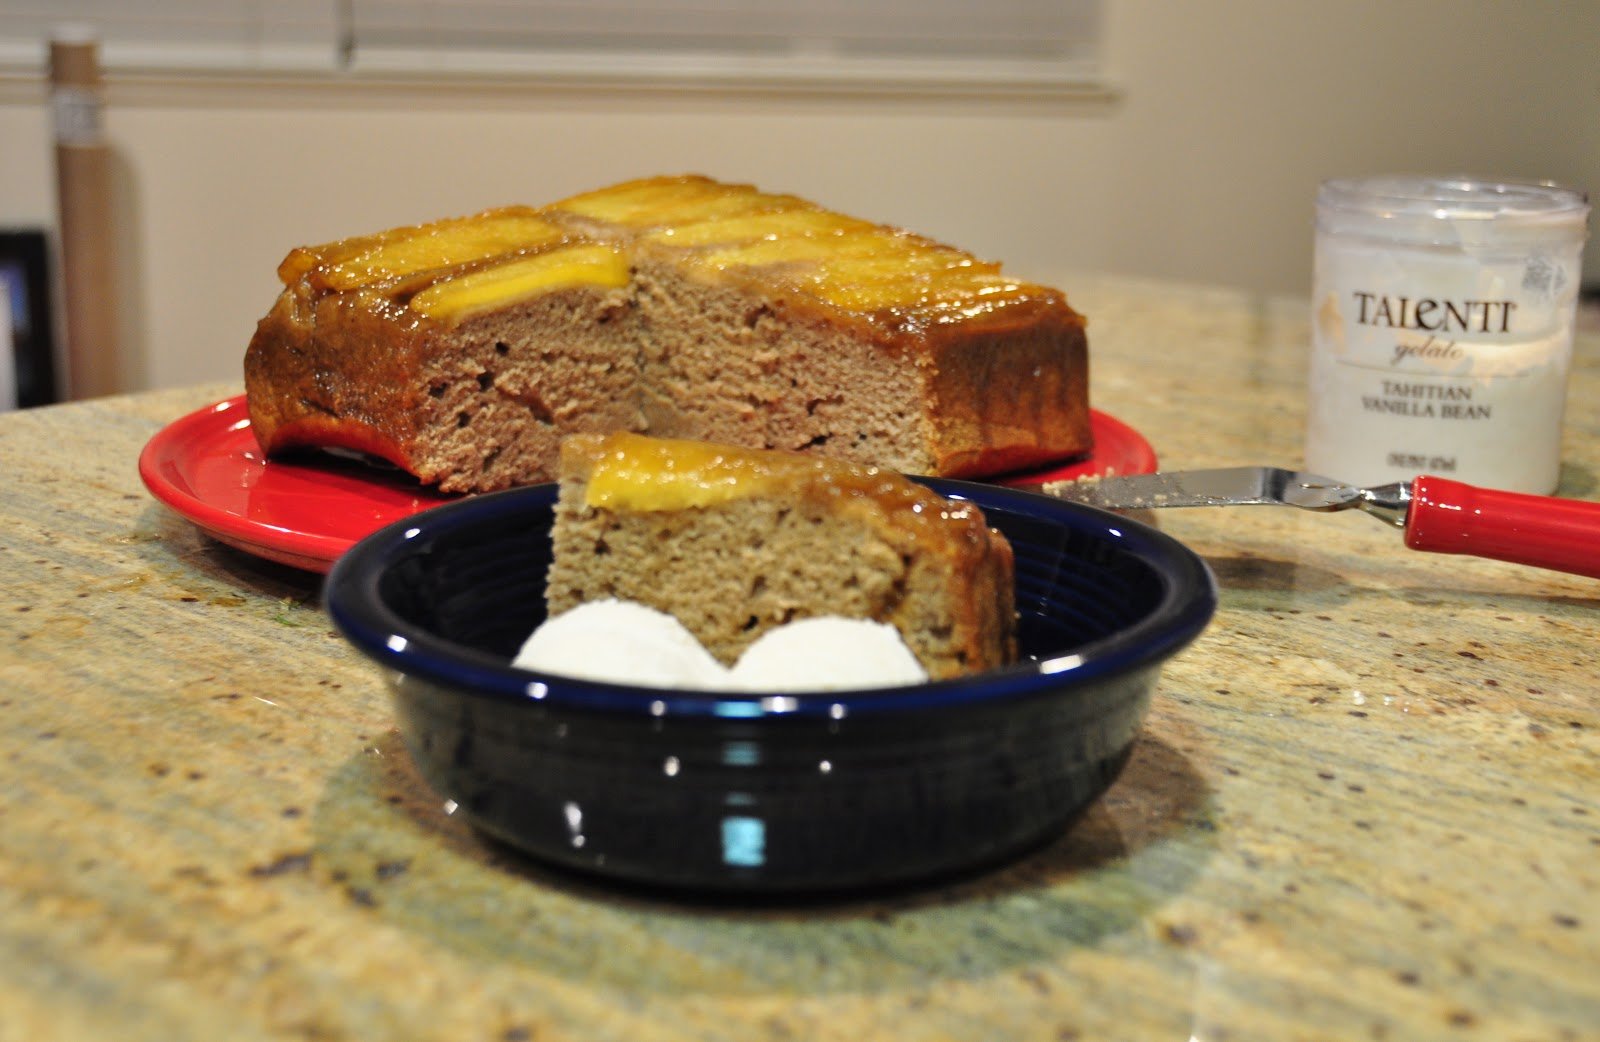
The cake came out looking a bit funny and lopsided but since it was going to flip it upside down I didn't worry much about the look of it.


Once it was flipped you hardly noticed that it was funny on the bottom. If yours comes out funny you can always trim it flat before you flip it. I was very excited that we got to use our Fiestaware cake plate for the first time. A cake like this requires ice cream of some sort. Talenti gelato is one of my favorites right now. It comes in great flavors and the container is reusable.


I am not usually the dessert eater in the house but this was so good I wished I had cut myself a bigger piece.


Jamaican Spiced Upside-Down Cake

Serves 9
Active time: 20 minutes Total Time: 1 hour 20 minutes + cooling time

9 Tablespoons unsalted butter, divided
1 1/2 cups packed dark-brown sugar, divided
1 pineapple, peeled, cored, and cut into 1/8 -by 4 3/4-inch slices
1 can (13.5 ounces) coconut milk
3 large eggs, lightly beaten
1 Tablespoon grated lime zest plus 2 Tablespoons lime juice
2 teaspoons pure vanilla extract
3 cups all-purpose flour (spooned and leveled)
1 Tablespoon baking powder
2 teaspoons ground allspice
1 teaspoon fine salt

Preheat oven to 350F Melt 5 Tablespoons butter and add to a 9-inch square baking pan, tilting to coat bottom and sides. Sprinkle with 1/2 cup sugar and arrange pineapple slices in 2 slightly overlapping rows.

In a large microwave-safe bowl, microwave coconut milk and remaining 4 Tablespoons of butter in 20-second increments until butter is melted but not hot. Whisk remaining cup sugar to remove lumps, then add to bowl. Whisk in eggs, lime zest and juice, and vanilla.

Whisk together flour, baking powder, allspice, and salt. Add flour mixture to coconut milk mixture in 3 additions, whisking until smooth. Pour batter over pineapple and spread in an even layer. Tap pan on counter to remove any air bubbles. Bake until cake is golden brown and a toothpick comes out clean, 1 hour. Let cool on a wire rack, 1hour. Run a knife around edges before inverting onto a platter. Serve warm.

Tips:
Buy fresh pineapple spears to save time
Make sure coconut milk and butter don't get to hot or eggs will cook when added
place aluminum foil under pan as it cooks to catch juice that may bubble over


Linked to House of Hepworths

Wednesday, January 16, 2013

story of a challenged shopper

Hi, my name is Anne and I am not a good shopper. When I go out with a purpose of finding something for the house I come home with the wrong something or nothing. More often than not I come across something I love and talk myself out of it because I don't know if it will go, I don't know if it will be the right color or if there is enough space to fit it or if it is the right style.  I have zero confidence when it comes to picking things out for my own house. A similar thing happens when I try to buy clothes but that would be a far longer post. This is why large portions of the house are largely under-decorated. Well that and I don't have as much drive to decorate a rental as I would my own house. In an effort to boost my confidence and make it harder to stop talking myself out of the right items I created a little binder for myself.

I limited myself to the 5 many rooms in the house that I want to decorate: kitchen, living room, hall bathroom, bedroom and craft room.


Supplies:
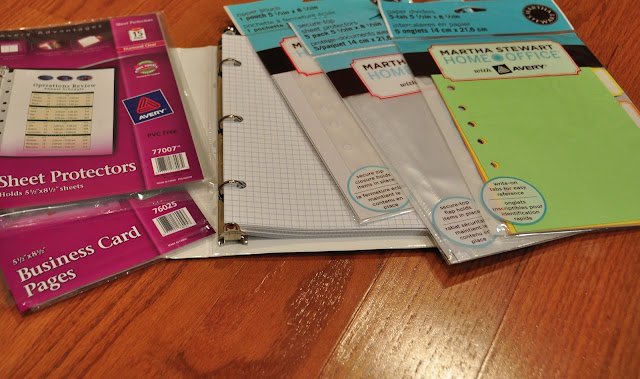
binder - the right size to fit in your purse this one is 9x7 and 1/2 inch thick
graph paper
dividers - I used Martha Stewart dividers from Avery
business card holder sleeves
sheet protectors - I like the Martha Stewart version with the flap at the top so things don't fall out
zip pocket


In the business card holders I cut out paint chips to create the color scheme. These chips match my planned color scheme, things I have already painted and colors of fabrics in the room.


In the sheet protectors I have any inspirations pieces or fabrics. In the kitchen one I have some wrapping paper I love and in the craft room I have fabric from the curtains


On the graph paper I have drawn out each room with the measurements listed on each wall. Where I have already placed furniture I have sketched that in as well and it make it easy for me to figure out how much space I have left. I have also noted any heights of windows and ceilings I think I might come in handy for curtain shopping.


Carrying this book and a measuring tape is taking some of the guess work out of shopping. I also came up with some tips for myself to remember when I am shopping so I can increase my chances of coming home with the great find.

1. Know what you are looking for but let your eye wander
Go with a little bit of mission. Know what pieces you need in the house right now. It will help eliminated that overwhelming feeling in the larger stores. As you look for those pieces scan everything else and if you eye catches something go in for a closer look. It might turn out to be exactly the thing you need for another room. Limiting yourself might keep you from finding your perfect match.

2. You can paint just about anything
This is one I only recently learned from reading so many great blogs. I have passed up dozens of lamps and small side tables because they were the right shape but the wrong color. Hello spray paint! Where have you been my whole life? Realizing I could spray most materials to the color I want is one of the most liberating moments. It has me wanting to bring home all kinds of trash and paint it up to be my treasure!

3. Put it on hold
Just can't decided if it is the right piece for you? Then don't! Shop around, if you have to push it with so no one snags it while you look you or have them put a hold sticker on it. But make sure to sit with that big decision. Most likely you can't return it. If you can return it go for it. Otherwise mull it over. If it seems right and you feel like you would regret not purchasing it then do it. If you just aren't sure let it go something better will most likely come along.

4. Make sure you need it
Don't buy it just to buy. Unless you want to make a small business out of refinishing and then reselling on craigslist. If that is the case buy as much as you have time to work on and money to spend. Since this is not my goal I am putting a lot of stuff down and saving money to get my very own house some day.

5. If it is a dream piece and you have room buy it
If you have lusted after, dreamed of, coveted or your grandma had one just like it and it was your favorite...buy it. Make sure you can afford it and it is in good condition but don't walk away regretting the fact that you didn't get that piece. I am still kicking myself over the sewing table that I didn't buy last month.

Have any tips for the challenged shopper?

This post is linked at Liz Marie Blog and House of Hepworths

Friday, January 11, 2013

magazine challenge of 2013


This year I am challenging myself to cook from every food magazine I get. Something had to happen to keep me from collecting hoarding recipes from magazines that I have never made and probably won't. The real goal is to give me even more dinner ideas and make me branch out from old favorites a little more often. I am really excited about this and think it is going to make cooking even more fun.  Not to mention make me a little more discerning about which magazines I buy at the store and what recipes I tear out of the magazines. I am never going to make souffle and if I change my mind one of my 40+ cookbooks can tell me all about it.

Maybe you will find some new ones you like too.  I subscribe to 4 magazines that are food magazines or have recipes regularly. In addition to those I have a habit of impulsively picking up others at the grocery store. So if you follow along you will have the chance to find quite a few tested recipes each month.

Here is how the first few recipes went. After a long day of errands and taking down Christmas I got started on the magazine challenge. I made my choice based on the amount of time it would take to cook. I started looking at recipes at 5pm and had to go to the store to get whatever I was cooking so it needed to be quick. The first recipe that seemed quick was garlicky roasted shrimp with cilantro and lime from the January/February Cook's Illustrated. Cooked under the broiler it seemed a quick and easy way to make dinner but what to go with it. We eat pasta frequently so that didn't seem fun. I thought that just might not be the recipe for tonight. Then I looked at rosemary-rubbed rib-eye with charred onions from the February/March Fine Cooking (I am skipping the Dec/Jan issue because it arrived in December pre-challenge) and the idea of surf and turf seemed perfect. I changed the steak to Chiptole-rubbed because I thought that would go better with the shrimp.

It turned out to be like summer on a cold winter day. The Fiestaware always helps set the mood.


All of this was so good I couldn't stop talking about it while we ate. I was pretty proud of myself for this one. It was so quick I could do it any night too. Like I said I started looking at recipes at 5pm and had to go to the store and I still had dinner ready at 7pm. All of this is done under the broiler so it cooks very quickly at a high heat. Very similar to grilling. If you haven't used a broiler check out some of these basic broiler tips from Fine Cooking. 

Turn on the fan -- Broiling generates smoke and can set off smoke detectors. It's a good idea to turn on the exhaust fan, open a window, or both. -- wish I had read this before I started I smoked out the kitchen something fierce.
Determine if the oven door should be open -- Check your owner's manual to see if it's necessary and safe to leave the oven door ajar. In some models, the broiler will shut off when the oven reaches a certain temperature, so cracking the door will keep the oven cooler and the broiler on. But newer models may be designed fro closed-door broiling, and leaving the door open can melt the control panel, set off and alarm, or shut down the oven. -- my heating element visibly turned off when I closed the door so I went with open.
Heat things up -- You might think that the broiler doesn't need to be heated for long before you put the food in, but heating the broiler also heats the oven, which helps the food cook through faster so its exterior doesn't burn. Preheat your broiler according to manufacture instructions. 
Do a toast test -- There's a huge variation among broilers, so cooking times can vary. The length of time it takes to toast a piece of bread is a good gauge of how hot your broiler is. The cooking times given in these recipes are based on a broiler that takes 1 minute to toast a pice of bread that is 3 1/2 inches from the heating element. -- I did not test this I just rolled with their times and hoped. 

I cooked the steak first and then let it rest while I cooked the onions and shrimp. Everything was still warm when the shrimp came out of the oven.

Chipotle-Rubbed Rib-Eye with Charred Red Onions 


Bring steaks to room temperature before broiling will help them cook on the inside without burning on the outside. 

2 Tablespoons plus 1 teaspoon of olive oil
3 teaspoons chipotle powder
1/2 teaspoon garlic powder
Kosher salt and freshly ground black pepper
2 12-oz. boneless rib-eye steaks, about 1 inch think at room temperature
1 large red onion, but into 1/3-inch-thick slices

In a small bowl, combine 2 Tbs. of the olive oil, the chipotle, garlic powder, 2 tsp salt and 1 tsp pepper to make a paste. Rub onto both sides of the steaks

Position a rack about 4 inches from the broiler and heat the broiler on high. Heat a broiler-safe cast-iron grill pan or skillet on the stove top over medium-high heat until searingly hot (at least 5 and up to 15 minutes). I knew mine was ready when i sprinkled water on it and it beaded up and skated around the pan

Put the steaks in the hot pan and transfer to the broiler. Broil about 2 minutes per side for medium rare(130 degrees F), or until they reach your desired degree of doneness. Transfer to a cutting board, tent with foil, and let rest.

Brush the tops of the onion slices with the remaining 1 tsp of olive oil and season lightly with salt and pepper. Put in the pan, oiled side up, and broil until lightly charred, about 4 minutes. With tongs, separate the onions into rings, toss and continue broiling until crisp-tender and deeply charred, about 4 minutes more. 

If making the shrimp tent onions with steaks. If not serve steak with onions on top.

Garlicky Roasted Shrimp with Cilantro and Lime

There was a warning saying: Don't be tempted to use smaller shrimp with this cooking technique; they will be over-seasoned and prone to overcook. That being said I used 21-25 shrimp that were called jumbo and used a smidge less seasoning and they didn't over cook and could have handled the full seasoning.

1/4 cup salt
2 pounds shell-on jumbo shrimp (16-20 per pound)
1/2 cup vegetable oil
2 teaspoons crushed coriander seeds
2 teaspoons lime zest
1 teaspoon annatto powder - can replace with paprika. I used chipotle to give it some heat
6 cloves of garlic, minced 
2 Tablespoons minced fresh cilantro
lime wedges

1. Dissolve salt in 1 quart cold water in large container. Using kitchen shears or sharp paring knife, cut through shell of shrimp and devein but do not remove shell. (Mine already had this done at the store so I saved time there). Using a paring knife, continue to cut shrimp 1/2 inch deep, taking care not to cut shrimp in half completely. Submerge shrimp in brine, cover and refrigerate for 15 minutes. 
2. Adjust oven rack 4 inches from broiler element and heat broiler. Combine oil, garlic, coriander, lime zest, annatto powder in large bowl. Remove shrimp from brine and pat dry with paper towels. Add shrimp and cilantro to mixture and toss well, making sure butter mixture gets into interior of shrimp. Arrange shrimp in single layer on wire rack set in rimmed baking sheet. 
3. Broil shrimp until opaque and shells are beginning to brown, 2 to 4 minutes, rotating sheet halfway through broiling. Flip shrimp and continue to broil until second side is opaque and shells are beginning to brown, 2 to 4 minutes longer. Transfer shrimp to serving platter and serve immediately. Squeeze lime wedges over shrimp if desired. 


This post is linked at House of Hepworths

Thursday, January 10, 2013

DIY project list 2013


When I made my first list of goals at the end of last year I got to twelve and still had one more I wanted to add to the list. I like round and even numbers so this was annoying. If given the option I won't pick 9 I will just take one more to make it 10 and probably 2 more after that to make it an even dozen. Luckily, 13 is a favorite number (5 is my other favorite since I know you are wondering that) so keeping it at 13 just worked. When I decided to make my project list for around the house I just left it at 13 because two lists of different numbers would have driven me even more crazy.

My first list leans toward self improvement and this second list is much more home improvement. I need the list because my attention tends to drift and I become idle and then accomplish very little. I want to look back on 2013 and be impressed with just how much I accomplished. Some of these are here to help me learn new skills, some are easier things I have always wanted to do and some are just needed projects in our house.

While proofreading the final post it finally dawned on me that both my lists for 2013 are 13 items. I am a little slow to catch on sometimes but there it is 13 items for 2013.


1. First up is to make a baby shower gift for a family member. Since I have started on the felt ornaments I have searched out some cut ideas for felt projects for babies. The baby shower is coming up in a few weeks so I am going to need to get started on this one quickly. More information when it is done because I don't want to spoil the surprise.

2. Time to frame art work and hang in the hall bathroom. The art work I have had for a while and it really is time to get it framed. I should really apologize to my brother and Maya here because this isn't the only picture that has their art not displayed properly. At the old apartment it was on the walls but without frames and that won't work for the damp bathroom. I am going to do a kelly green and navy blue color scheme. 

3. Sew some pillow covers using dishtowels. I have wanted to do this for years but had trouble finding dishtowels and then didn't have a sewing machine. Now the worlds have come together and I have both. They will be perfect on the wooden chairs next to the fireplace.

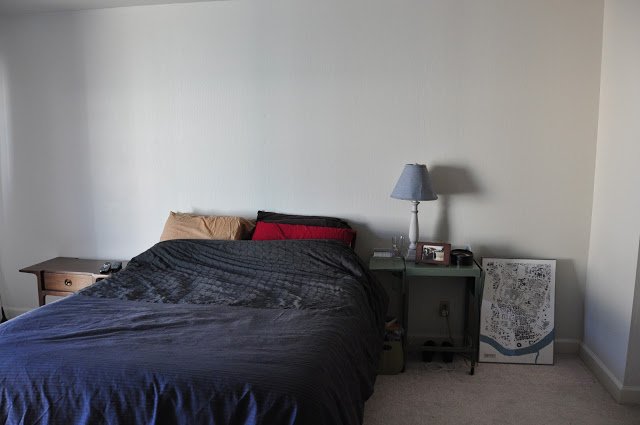
4. We have been in this house for four months and we still don't have much on the walls. Tom has his room done with his jerseys and I have some art on the kitchen wall but that is it. The bedroom is such a mismatch of things. A lamp my mom got me years ago, a great mid-century modern side table of Tom's and my metal typewriter desk. Some thing really needs to happen to make it all come together.

5. Create a "laundry room" in the garage. One of the big perks of moving to this house was buying our own washer and dryer. We could use some storage for the laundry supplies. We came from the city with limited space so thinking about storage solutions on this grand of a scale is completely foreign to us.


6. When I bought the Christmas ornaments I also got us an advent calendar. So before December 1st this bad boy needs to be completed. 228 pieces and I am on piece 15.

7. Make the back porch summer ready. I can't wait to have a grill and eat dinner outside this summer. The porch will need a few things to make that happen.

8. Plant some kind of garden. I grew up with a garden and would love to be able to pick some of my own veggies this summer. 

9. Now that I have a sewing machine and a fascination with shopping the fat quarters at the craft store I am going to eventually need to find something to do with the accumulating fabric. I made a duvet out of squares years ago but have never done the entire process with batting and quilting. I am very excited to give it a shot.

10. When we bought the two yellow chairs for $50 the plan was to get them redone. We looked into the cost of having them done and it was more than we wanted to spend. We did some research and I think we could do this ourselves. We will learn something new even if we never do it again and if it doesn't go well we can always get them done by someone. 


11. When we bought the coffee bar cabinet we bought this table and it really is about time I get around to completing this. The challenge is there was linoleum type surface one the top and the large portion of the bottom piece and I need to figure out what to fill it with. Maybe tile so you don't need a coaster.

 12. When we met we realized we both want to attend a game at all of the ball parks. We would love to do them all in a year but that is going to have to wait until we retire and buy and RV to drive around the country. Until then we try to get to a couple new parks every season.  At each park we buy a pin and take pictures of a park to put in a frame. I would like to get these on the wall before the completion of the next baseball season.

13. I have a weakness for aprons. I love them and I do use them when baking but I have no place to put them so I need a coat rack to help here and also need a bookcase for my other weaknesses: cookbooks and Le Creuset. I really want my Le Creuset to be part of the kitchen decorations and I can't seem to stop buying new cookbooks.


There is a little glimpse into what will be coming on the blog this year. Any project you are looking forward to seeing more than others? Got some suggestions? My inspiration is over at my Pinterest page if you want to see where some of this might lead.

Wednesday, January 09, 2013

update on my baker's dozen list

Last month I made my new years goals and posted them. I am keeping them in the sidebar as a reminder of what I am challenging myself to do this year. Since I got a jump start on the new year I already have some updates.

1. Make money (even if it is only $20) from blogging
I have decided that the money I make from blogging this year will go to one of the organizations in goal number 9. This will help motivate me to monetize the blog and it will go to a good cause. 

2. Cook dinner 3 nights a week
This is going well so far. This week I have cooked three times already so I can take the rest of the week off right?

3. Shop at the farmers market so often a farmer recognizes me
Haven't gotten started on this one yet. The closest market is on Tuesdays and there were other things to be done. I have 51 more weeks to make this happen.

4. Learn a new family tradition or recipe
This is probably going to be flour tortillas and tamales. I am very excited about learning both. 

5. Attend an event where I don't know anyone
This is going to be the hardest out of all of them and certainly the most out of my comfort zone goal.

6. Learn to network either online or locally
I think this is on there just so I can get business cards. I have started making some new online friends it is all baby steps.

7. Blog 3 times a week or 12 times a month
A bit of a slow start but it is a start so onward and upward.

8. Teach someone to cook
Hopefully I can find an organization that will have me as a volunteer at some cooking classes. If not I may just teach some of the kids at work how to cook.

9. Donate money to something I believe in
 I have picked two organizations for this goal the first is No Kid Hungry and the other is Alzheimer's and more specifically the Walk to End Alzheimer's. I will have more posts about why these organizations and how you can help too.

10. Send birthday cards to family and friends
If we are friends and I don't have your birthday or address email me so you can get on the list!

11. Cook one recipe out of every food magazine I get
This is helping curb my impulse purchase of magazines at the grocery store checkout. I subscribe to 5 cooking magazines so I don't have a shortage to cook from.

12. Read the art of eating by M.F.K. Fisher
I am buying this today so I can get started!

13. Complete 18 holes of golf
Need to get back to the driving range and get some practice in and start playing the local 9 hole course. Tom isn't going to let me slip on this one!

Coming later this week the projects I plan to tackle in 2013, a summer dinner you can make in the winter! Hope you come back. 
Related Posts Plugin for WordPress, Blogger...