Wednesday, August 28, 2013

decorating plans and a new list

Yesterday I talked about the list from the beginning of the year and my progress and today is about my new list. This list is going to be a little different and is here to hold me accountable to trying to finish it as well as tell you what might be coming down the road on this little space of mine. Instead of a list of various things this is going to be by room of the house and I am going to try my darnedest to finish one room and move on to the other. I have the attention span of a 5 year old when it comes to projects. I have half completed projects all over the house so this will be tough.  Plus I am going to do it all while managing my holiday projects list.

Bedroom:

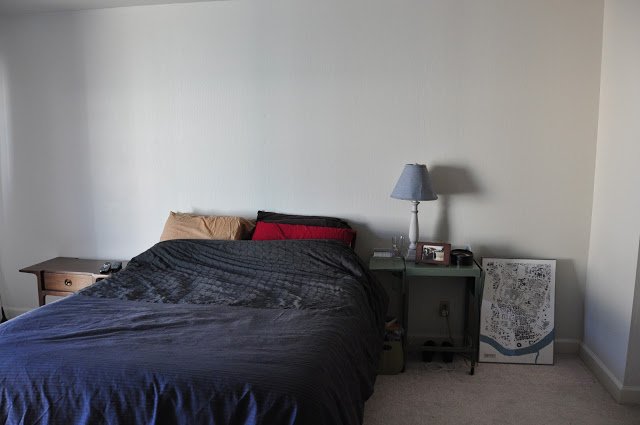
It is tough when you are renting but not impossible and this really needs more. Just more of everything. I have got some things off the list but it is still a few weeks away from any sort of progress and probably months from a full reveal, but I am really excited about it.

Decide on a theme/color pallete and stick with it
Hang artwork
Paint side tables
Decide on lighting
Buy a dresser so we have a place to put our clothes

Craft Room:
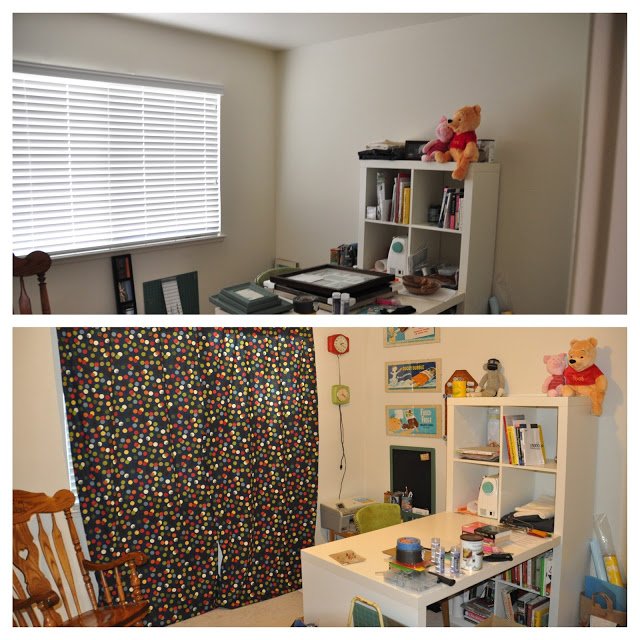
It has made some progress but it needs more. The pile of stuff on the table and in front of it keeps growing. I want to make it a fun and colorful space that I want to be in. I really need to work on using that sewing machine more. 

paint funhouse mirror
hang recent purchase from thrift store
storage solutions or purge crap that is piling up
decide how to paint rocking chair

Kitchen:
Unfortunately I don't have a good picture of the kitchen area. The majority of it is actually complete it is just finishing touches I need to do. This is the china cabinet that I will be finishing. This is the picture I sent Tom to see if he could live with it before I bought it.

hang vintage kitchen utensils
finally hang aprons either on hooks or coat rack
paint china cabinet
sew or buy a table cloth
paint and reupholster table chairs

Holiday Plans
These are my big projects that have a timetable. The rooms really don't have to be done at a specific time but Halloween and Christmas they are coming regardless of what project sounds like the most fun to work on each weekend. I am challenging myself to get a lot done in the next few months.

Halloween:
find a way to make a display of my Halloween pieces
Pick a theme for front yard
Plan the front yard decorations
Execute front yard decorations
Decorate mantle

Christmas:
make enough jelly and jam for each person on the Christmas list of 30
make cookies for Christmas list
make cookies or jam for work gifts for 30 people
package homemade gifts in homemade cute packaging
make an even better mantle display this year
step up the outside holiday decorations this year

As if that wasn't enough, I am also adding trying to complete a 16 week link party being hosted by a few other bloggers. The challenge of doing all 16 weeks was too much for me to pass up. Hopefully I can complete at least 12 of the challenges with new projects. I already set up a pinterest board for inspiration.

That is what you can look for in the coming months with some more magazine recipes thrown in. What are you working on for the rest of the year?

Tuesday, August 27, 2013

list update and getting ready for new plans

It is time for a new list! Months ago I made a DIY list of projects and I have done fairly ok with this list but over time some of the projects have taken on a new life or I completely changed direction on a room. So we will go through a quick recap of the first 13 that were created in January and then it is time for an updated list that I hope to accomplish before the year ends. Before I jump to my new list how about a little update about where I have been so far.


1. baby shower gift - I finished the mobile right on time for the baby shower
2. frame artwork for the bathroom - this has been changed completely. We went with a different theme which I like even more and with some finishing touches I may actually post about it.
3. sew pillows from state dishtowels - this needs to still be done and it is so easy I just need to make it happen already
4. hang art in bedroom and make it look complete - you will see more of this in the new list
5. create "laundry room" in garage - I got a shelf and a spray painted rug so I it doesn't feel a little better. May add some other touches but for now I would say this is done. 
6. sew advent calendar - this too will be staying on the new list. I have made great progress but really need to kick this in high gear if I want to be done by December 1st. 
7. back porch ready for summerI think with the table and the lights we are in good shape
8. plant a garden - It was planted and it was fun to watch but my green thumb needs some work. Maybe I will revisit this again next year after I make the soil richer.
9. make my first quilt - I have an idea but this is on the back burner and I really should finish the brooklyn quilt before I move on to any others. 
10. reupholster chairs - coming off the list for now
11. make side table - I am really proud of this one! I love how it turned out with the blue and the pennies
12. hang pins from ball parks - not quite at that finishing stages. Got a great idea just need to figure out how to execute it and then where to put it.
13. solve the pile 'o apron problem in the kitchen - I have a bin that they are piled in which looks better than the milk crate they were in but I would still love to find the perfect solution to hang them.

I am really proud of these projects and the progress I made this year. I would say that the last 8 months have been pretty productive. After May I took a few months off and now I need to get back at it and cross some things off the list and add some new things that are driving me crazy they aren't done. That is where tomorrows list is coming in. I have come up with a new list of exciting projects and rooms I want to complete. I can't believe it but I am gearing up for the holidays already too!

Have you had a productive year so far? If not are you going to finish it off in style?

Friday, August 23, 2013

one pan pasta puttanesca style


This one pan pasta has become a lifesaver. It is just so easy to do and to customize that I keep making it. It works well on nights when Tom works late because I feel like I am actually cooking myself dinner but it doesn't seem like too much of a production for only me.

The other night I was heading home and thinking about one pan pasta and remembered a friend's post on one of her versions of one pan pasta. Ginnie from Hello Little Home and I are both enamored with this recipe. Aside from checking out her variations of one pan pasta you should check out her blog. Ginnie used to live in San Francisco not far from where I lived. I used to watch football with her Tampa Bay loving husband and some other friends. Oddly though Ginnie and I never met and now she is across the country in New York. It is a shame we never met because based on her blog she seems like a cool lady. Her instagram really can't be topped and she adds great pictures of New York to some of her posts that make me want to hop on a plane to NY at least a few times a week.

She had suggested a puttanesca version which I thought of and then remember the puttanesca recipe my mom used to make and I was suddenly on a mission to have that for dinner. I had planned on making my mom's version but it takes an hour to simmer and at 7:30pm I wasn't interested in waiting an hour and boiling pasta. So I took all of the ingredients from my mom's recipe put them in the pan with the water and oil and 10 minutes later I was eating. Some day I will make the long recipe and share the story of puttanesca with you. In the meantime thanks Ginnie for the inspiration it was delicious and even better as leftovers.


One pan pasta puttanesca style

12 ounces linguine
2 cans of diced tomatoes
1/2 cup sliced kalamata olives
4 cloves garlic, crushed
2 Tablespoons capers
2 Tablespoons anchovy paste
2 Tablespoons extra-virgin olive oil
Coarse salt and freshly ground pepper
4 1/2 cups of water
crumbled feta cheese

1. Combine pasta, tomatoes, shallot, garlic, basil, olive oil salt and pepper and water in a large straight-sided skillet. Bring to a boil over high heat. Boil mixture, stirring and turning pasta frequently with tongs, until pasta is al dente and sauce has thickened, about 9 minutes.

2. Season to taste with salt and pepper, garnish with basil and mozzarella balls, toss.

Monday, August 19, 2013

caramelized peach ice cream

From my trip to the farm I over purchased, which I do a lot. This time it was peaches. Not wanting them to go to waste and with not desire to make more jam and cut up more jalape簽os I decided on cobbler and peach ice cream. 


In addition to making use of some great peaches this ice cream killed a couple other birds for me too. I got to finally use the ice cream maker we got as a gift for our wedding, I got to cross another recipe off my magazine challenge and we were out of ice cream so one less trip to the store. It was a little more time intensive than I thought. Not at all the hour the Martha Stewart people told me it would take. That seems to always be the case for me though so I think it is me not them. Though knowing what exactly was in my ice cream and just how fresh it was balances it all out. 


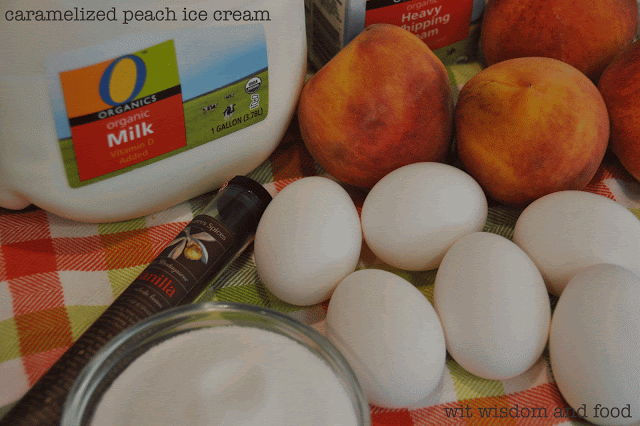
Ice cream really calls for very little. The vanilla custard base calls for milk, heavy cream, egg yolks, sugar and vanilla. The peach portion of the even only needed peaches and sugar. I was very excited about the containers I was going to get to put my ice cream in. We have been eating Talenti gelato and they come in these great plastic containers that have been great for leftovers in the fridge and the freezer. Getting to use them for our ice cream got me really excited. So excited I had to photograph it and show you just how cool they are! It really is the little things.


 The cute bowl was part of the gift with the ice cream maker and while we hadn't used the ice cream maker we use those bowls every week for some kind of snack or dessert. I just realized this whole post ties back to the people that gave us the ice cream maker and bowls because they introduced us to that gelato.

Below I have the recipe typed out so you can check it out. If you want an easy printable version you can click the link and head to Martha Stewart web site. There were other great recipes in this issue. Fresh fig and chocolate chunk ice cream looks like a great one to try and if you are adventurous sweet corn and basil ice cream looks yummy too.

Caramelized Peach Ice Cream from July/August issue of Martha Stewart Living 

1 pound ripe peaches (about 3 medium)
3/4 cup sugar
Vanilla-Custard Ice Cream base (see below)

1. Bring a medium pot of water to a boil. Add peaches to boiling water and blanch until skin is pulling away, about 1 minute. Transfer to a bowl of ice water. When cool enough to handle, peel and pit peaches. Cut into 1/2-inch pieces.

2. Combine peaches and sugar in a medium saucepan. Cook over medium heat, stirring constantly, until just caramelized and syrupy, about 20 minutes. Let cool completely. (You should have about 1 1/4 cups.) *tip...if you don't cool the peaches completely when you add it to your churning ice cream it will melt and take longer to set in freezer.

3. Chill a loaf pan in freezer at least 10 minutes. *I skipped this step because I put my ice cream in my fancy containers

4. Freeze and churn custard base in an ice cream maker according to manufacturer's directions. Add peaches at end of churning and churn 5 more minutes; transfer to pan. Cover with plastic wrap and freeze until hardened, at least 2 hours; ice cream can be frozen 2 weeks ahead.

Vanilla-Custard Ice Cream base

1 cup whole milk
1 1/2 cups heavy cream
1 vanilla bean, split and scraped
6 large egg yolks
3/4 cup sugar
1/4 teaspoon coarse salt

1. Combine milk and cream in a medium saucepan. Add vanilla seeds and pod. Bring mixture to a simmer over medium-hihg heat, stirring occasionally; remove from heat.

2. Whisk together egg yolks, sugar, and salt in a large bowl. Gradually whisk in half of milk mixture. Pour egg-milk mixture back into pan and cook over medium heat, stirring constantly, until thick enough to coat a wooden spoon, 6 to 8 minutes.

3. Pour costard through a fine sieve into a bowl set in a larger bowl of ice water; discard vanilla pod. Let cool, stirring occasionally. Cover and refrigerate until cold, at least 1 hour; custard base can be refrigerated up to 2 days ahead.

Friday, August 16, 2013

yellowstone

Years ago my dad decided he wanted to go to Yosemite. He called it a once in a lifetime trip. That he proceeded to do 3 more times. The first trip was with my brother and my mom and I met them there. The next year my dad and I went the two of us and then the last year it was my dad, brother and I. They were all great trips. When he said they were thinking about going to Yellowstone and renting a cabin I knew I didn't want to miss it. So the 6 of us hung out at a cabin in Montana for a few days and enjoyed big sky country together.

My dad has always been an avid photographer. He had his own dark room years ago and over the years has amassed quite the collection of lenses, tripods and gadgets. When I bought my camera a few years ago I bought a Nikon so when I went hiking with my dad or brother we could all bring different lenses to share and no one had to carry too much. When he said he was bringing the macro lens on this trip I couldn't wait to get my hands on it.

I love the details of up close photos. Photos that show a completely different vantage point and beauty that you might not notice otherwise.  I have mentioned how much I want this lens multiple times when I haven't been able to get the shot with my current lens. After a few days with the lens it might be time to treat myself and add a macro to my equipment.

I took some pictures of the landscape and of course old faithful, which was cool but not as impressive as we hoped. The smaller geysers that you can get close too really were more impressive because of the proximity and heat you could feel coming off them. Of course there were some wildlife shots as well. Who can resist a few hundred shots of buffalo? Luckily, I spare you of all of that in the following recap.


This was our first night in Montana and the first picture of the trip

my dad doing what he does, a buffalo and a coyote that at the time we thought was a wolf.  


this was the best shot I got of a bear i have been closer to one in yosemite but that bear didn't look like he was interested in a photo-op


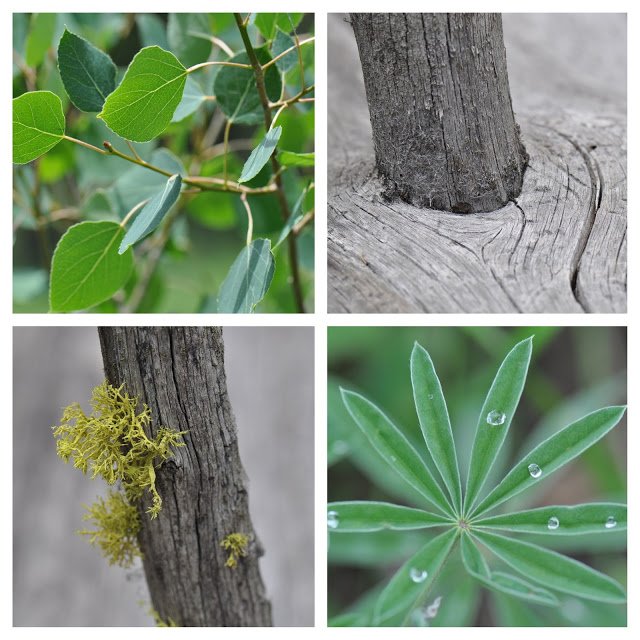
flowers and bugs on flowers


it certainly is beautiful out there


more flowers and bugs on flowers


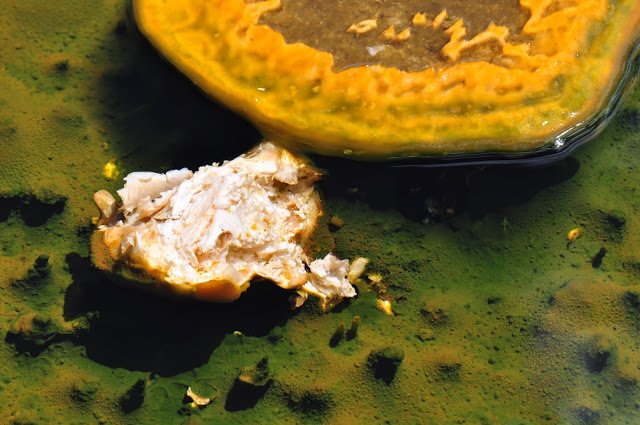
the steaming pools looked like another planet


more shots of the steaming pools


The colors and contrasts were out of this world and so was the heat and the smell of sulfur


trees and leaves


butterfly and ladybugs always seem like good luck 


this little guy was hanging from a tree 

Wednesday, August 14, 2013

one pan pasta caprese style


When I first tried the one pan pasta in Martha Stewart and loved it I quickly came up with a few versions I wanted to try. The same week I made the pasta with some zucchini and it was delicious. Last night I made the caprese version. This is really one of the easiest meals to make. I loved how light and fresh this version was. I was out of onion so I used shallots instead and I think I liked it more than all the onion the original version calls for.

One pan pasta caprese style

12 ounces linguine
12 ounces of cherry tomatoes, I used yellow and red for variety
2 shallots sliced
4 cloves garlic, thinly sliced
2 sprigs basil, plus more for garnish
2 Tablespoons extra-virgin olive oil
Coarse salt and freshly ground pepper
4 1/2 cups of water
mozzarella balls

1. Combine pasta, tomatoes, shallot, garlic, basil, olive oil salt and pepper and water in a large straight-sided skillet. Bring to a boil over high heat. Boil mixture, stirring and turning pasta frequently with tongs, until pasta is al dente and water has nearly evaporated, about 9 minutes.

2. Season to taste with salt and pepper, garnish with basil and mozzarella balls, toss.

Monday, August 12, 2013

how a book keeps changing my life


X number of years ago I had something messy and unpleasant happen in my life. It happened shortly after the book Eat Pray Love came out. I must have picked it up at the bookstore a couple hundred times, read the back cover, put it back down and moved on. I probably would have never read the book if a friend hadn't given it to me as a Christmas gift.

To say a book changed my life seems so cliche. Especially since I don't think anyone can save you but you. Ideas can cross your path but if you don't put them into action you will not be saved. That being said that book crossed my path at exactly the right time. There are so many things about the book that spoke to me, but as I watched the movie the other day it was a new quote that spoke to me. "God dwells in me as me." I looked up the quote from the book because I couldn't seem to get it out of my head. Here is what the quote from the book says:

"God dwells within you as yourself, exactly the way you are. God isn't interested in watching you enact some performance of personality in order to comply with some crackpot notion you have about how a spiritual person looks or behaves. We all seem to get this idea that, in order to be sacred, we have to make some massive, dramatic change of character, that we have to renounce our individuality. To know God, you need only to renounce one thing - your sense of division from God." 

I grew up going to church. I loved it. I loved that the people I met there were the first ones I felt truly accepted by. As I got older and was around other conversations and more adults in the church I started to become very unsatisfied with church. I couldn't understand how people could sit in church hear a sermon, say prayers and then walk to the coffee hour and start gossiping about and judging other people. This certainly wasn't all people but it was enough that by time I graduated college I stopped going to church almost all together.

As I read Eat Pray Love and started making changes in my life to learn more about me and love me I started thinking more about spirituality and what place that had in my life. I wanted to figure out what that looked like for me. Did that mean going to church again or something completely different. I still don't know but when we got married and attended our marriage counseling the thoughts came back. Some other things in my life have made the topic even more prominent in my mind. So the other night when I saw the movie was on I was quick to tune in and when the quote wouldn't leave my head I knew there was a good reason for it. The short quote isn't that helpful for me but the longer quote from the book has helped me shed some light on where I am at in my life and my relationship with God.

I have come to realize I have been spending too much defining what it should look like and what others will think about my relationship and not enough time just realizing it exists that it always has and I need to spend some time strengthening it. I don't have to read the bible, it isn't necessary for me to be able to quote scripture to have faith. I don't have to go to church every sunday or any sunday for that matter to have a connection to God. What I need to do is what comes natural to me and push myself to be better. I need to be compassionate when it is hardest, I need to try to be better even when I am pretty good, I need to let go and trust the choices I have made even when I want to control it all and I need to be open to the things that come across my path because there is no telling which one will change my life.

Sunday, August 11, 2013

yes, I can. do you?

I got a wild hair and decided one day I was going to make jam. I have wanted to can for years. I had most of the canning supplies for months but had done nothing with them. Then I drove 40 minutes to Brentwood for strawberries. I of course bought too many and spent an entire day in the kitchen cutting up strawberries. What I got in return was a lot of strawberry jam. Friday morning I got that same crazy idea and decided to make the drive again. This time I was in search of cucumbers to turn into pickles. I came home with a lot of cucumbers....peaches, zucchini, green beans and enough Ball jars from Target to make Christmas presents for everyone on my list. I hope you all like canned goods.

What was going to be a one day project turned into two.


I have already yielded 9 jars of jalape簽o-peach jelly, 12 quarts of pickles and 5 jars of zucchini bread and butter pickles. Add that to the 11 jars of strawberry jam I already have put away I am getting quite a haul. I started the two week process of making 14 day pickles which are delicious and I haven't had them in years. I may not share these.

I hope I can find time to make it to the farms one more time so I can get some tomatoes and make my own sauce and canned tomatoes. I know I will make it up there to get some apples so I can have homemade applesauce. No applesauce is better than the one my mom made. The only applesauce I like is homemade with lots of cinnamon and chunks of apples in it.

I remember watching my mom do all of this when I was little and it has been fun to try my hand at it. I always seem to talk to her more when I start these projects. How many calls and texts does it take make some new recipes? I think I have made 3 calls, and a handful of texts so far.  I don't know how she did it with us running around the house. I had no one tugging on me and I still had a tough time. There were 3 pots that boiled over and caused me to have to clean the entire stove before I could continue. Recipes that should have taken 20 minutes felt like they took hours. At one point I was hopping around the kitchen because I got molten jelly on my leg when it spilled. My mom must be a superhero. It is really the only reasonable explanation. Maybe not the only reasonable one but it is the one that makes me feel better about my struggles at canning and the fact that the kitchen looks like this when I am done.


Even with the struggles this is one of the most rewarding things I do in the kitchen. The thrill of making dinner is gone the moment I eat it and realize I need to wash the dishes. Baking the cookies at Christmas is fun and a challenge to out do myself each year but once they are shipped what is left. Canning is the kitchen project that just keeps giving. You put all of the hard work in and then you squirrel it away. You can bring it out when you have a craving or need a quick hostess gift. It is like a savings account for your ego. Every time you open your pantry and see the fruit of your labor you can beam with pride that you did that.

The biggest things I learned this weekend:
  • don't try and do too many recipes in a day
  • you can do a batch of jam in the same amount of time you could bake cookies
  • canning recipes can be vague and you just have to learn as you go and trust yourself
  • jelly is really painful when on your skin
  • clean the kitchen and the dishes as you go
  • the sound of a jar successfully sealing is extremely satisfying 
Want to learn more about canning try these great sites 
Did you try any new projects this weekend? Do you can? Do you want to try? 

Wednesday, August 07, 2013

you should smile more

I got to put one of the toughest years at work behind me today. With my annual review I finally get to close that chapter and move forward on the new one. It wasn't my best review by any means and I knew that was coming. I worked hard ran a good store but fell short in some other areas.

I can't tell you how many times I have heard you need to smile more and until recently I never understood why that was the term that always got used.  I thought it was stupid when I would be told that because no one helped me figure out what it meant and I never took responsibility for it or tried to really change it. I figured if I just walked around smiling more it would be fake and that would be worse and it probably would have been. It has taken me years to see what it really means and figure out how to work that into my life. When people say smile more it is probably the easiest way for them to say you don't make them feel good.  It is really about how you make other people feel and not at all about the look on your face. If I take more time to connect with a person the look on my face will matter less.


Please direct all questions about that hairstyle to my mother. That face though is all me.  I have been making that face from whatever age that is to now. So probably a good 30 years of working on that. It probably won't be leaving me any time soon.  Hard to say why I had that face that day but there are plenty of other memories and photos with that face. I know why I make it most days now. It is because I just don't get why you did the thing you did. It is like a cartoon computer there should be a thought bubble above my head,  "does not compute, does not compute". I am easily irritated. It really is one of my biggest flaws. I work on it constantly.  Deep breaths before I talk and learning to let things go is helping but, I still make that face on days when I have had enough. If that was all I had to work on it might be easier.

Problem is I am also deathly afraid of disappointing people. I care a lot about what other people think. I try to figure out what their expectations are of me and I try to put myself in that or avoid situations when I think I can't meet their expectations. I have a lot of anxiety about this. It has caused me to be even more of an introvert than I am naturally. I would love to be the more outgoing one at a party that could strike up a conversation but fear always gets in the way. I plan out great conversations and always feel so confident and then I end up in the corner talking to the people I know already.

With all of that it sometimes amazes me that I have made it this far in a career that requires me to talk most of the day and to interact with a few hundred people a week at a company that is known for its fun and helpful employees. It has not been easy but it has certainly forced me to grow. Just when I think I have had enough and want to throw in the towel I learn something else and I am back at it trying to improve. This cycle has provided me with 10 years of very rewarding work and has challenged me more than I ever thought a retail job could.

So today when I go to work I will be putting one foot in front of another and trying to put in practice what I started to figure out. I don't have to actually smile constantly, though that couldn't hurt, I need to make them feel like I am smiling more even if I physically am not. And now I will be taking suggestions on how to do exactly that...kidding, I already have some ideas. But if you have more please add them I can you all the help you have to offer. Are you ready for how to make people feel happy without smiling?

1. be vulnerable and let them into your world
2. make an effort to be a part of theirs
3. say positive things

1. I have to go to work today and be vulnerable. This is by far the scariest one for me. I am so self-conscious that I hate talking about me. I am certain no one is really interested they are just asking to be nice. Reality is they are asking because they have to work with me and they want to be able to connect in some way. If they can't find that common ground the jumping off point for forging a relationship a healthy relationship will probably never develop. Even after typing that the thought makes my skin crawl and all I can think is what if they don't like me.

2. Very similar to number one, I have to find out what makes them tick so I can find a way to relate to them that will make a real connection. Everyone is different and prefers a different style boss. The good boss or leader makes an effort to adjust to their preference and doesn't expect them to adjust to his/hers all the time. I have not been that person. I used to try and make sure I knew a handful of non-work-related things about each person I worked with. With the added responsibility and expectations I lost that. I just stopped doing it and didn't realize until it was too late. I stopped asking about their lives and only talked about work and what we needed to do to improve. So back at it I go.

3. You can't make someone feel like they have been smiled at if you are constantly talking about negative topics. I was given a leadership reading a few years ago about the need to fill peoples buckets with positives before you need to talk about a negative. It was an excerpt from the book How Full is Your Bucket. I read it and forgot it. I have not put in the effort to make enough people know how much I appreciate them or say enough of the positive things I think. I know it works though because the ones that I have made the effort with have told me how it has effected them. So more genuine positive comments it is.

Here is the kicker the more I do these things with people the more I find I am naturally smiling. If I can get out of my own way I will be really good at this.


What do you need to improve? Do you smile all the time?

Monday, August 05, 2013

halloween planning has begun

I love Halloween like most people like Christmas. So much so that I actually won an award in a neighborhood decorating contest. When we moved we agreed the certificate had to stay with the house and I hope it is still there though I am sure the current owners have probably gotten rid of it. I haven't had a place as perfect for decorating since then. 5 years in the city didn't lend itself to outside decorations. Most years I still put up my display of Department 56 Halloween pieces, which are a post unto themselves, but that was about it. Last year we moved to the suburbs and I was very excited to have a front yard and a porch that would work well with decorations. I got the inside decorations up and managed to get some cobwebs up outside with our carved pumpkins but it wasn't the extravagant display I was hoping to create. This year will be different. I am starting my planning now! Beginning of August and I am starting on Halloween.

This is what I have to work with in the front of the house.


I am trolling Pinterest and hometalk and trying to develop a theme. There are timed sprinklers that I will have to consider with anything that goes on the lawn.

The ideas that I have found and love
  • a fence along the front of the yard
  • mummy votives
  • ghosts made from tomato cages
  • candelabra made from a floor lamp
  • creepy chair on the porch 
  • monster wrapped doors
  • tea-stained cheese cloth
  • lighted walkways 
  • styrofoam spiders
  • starch hanging ghosts
  • chicken wire "floating" bodies
I can't wait to see what I can create to make this year extra spooky. Do you start planning your Halloween decorations early? How early is too early?

Friday, August 02, 2013

glazed carrots with tarragon


I planted tarragon in the garden this year and I couldn't tell you why. I had never used it in anything and couldn't have told you anything about it when I bought it. For some reason it sounded like a good addition to the herb garden. That reason was probably just a result of me not being able to stop buying plants this spring. I finally had to make myself stop going to the nursery so I wouldn't buy anything else. I am so glad that I got that tarragon plant when I found this carrot recipe.

I love carrots but seem to rarely cook them. Now that I have a go to recipe and some tarragon they will be frequenting the dinner table much more often. My favorite are the colorful carrot varieties because they add such a burst to any dinner plate.

The recipe is very simple and takes very little time. The first time I made them I made them in a 10" skillet and the glaze and carrots were done at the same time. The second time I made them in a 6" saucepan and the carrots finished first. The called for 8" saucepan would certainly yield the best results but as long as you are testing the carrots along the way it is easy to keep them warm while the glaze finishes.

Head over to Fine Cooking to get this great carrot recipe from Michael Ruhlman and watch the video to help you tell when the glaze is done.

Glazed Carrots with Tarragon - from Fine Cooking issue 122

1 lb. carrots, cut into 1/2-inch rounds
3 T unsalted butter
1 1/2 tsp granulated sugar
kosher salt
2 T finely chopped tarragon

Put carrots in an 8-inch-wide, 3 to 4 quart saucepan and arrange snugly. Add the butter, sugar, 1/2 tsp. salt, and enough water to just cover the carrots (about 2 cups). Bring to a boil over high heat.

Cover over high heat, shaking the pan occasionally, until the liquid had reduced to a syrupy glaze and the carrots are tender, about 10 minutes. (If the glaze is done before the carrots, add about 1/2 cup water and continue to cook. If the carrots are done first, remove them and continue to boil the liquid until syrupy.)

Lower the heat to medium low, add the tarragon, and toss to combine. Season to taste with salt and serve. (the glazed carrots can be kept warm, covered, for about 20 minutes.)
Related Posts Plugin for WordPress, Blogger...